

How to Set Up Port Forwarding for Your Minecraft Server
Aug 11, 2026
Why you need port forwarding
When you run a Minecraft server on your home PC, other devices on the same Wi-Fi network can connect using your local IP (something like 192.168.1.42). But anyone outside your house, on a different network, cannot reach that address. Your router blocks incoming connections by default.
Port forwarding tells your router: "when someone from the internet tries to reach port 25565, send that traffic to my PC." It creates a tunnel through the router's firewall for that specific port. Your players connect to your public IP (what the internet sees), and the router forwards the traffic to your server.
The Minecraft default port is 25565. You only need to forward this one port. Coalstack's Networking page handles the rest.
Automatic port forwarding with uPnP
uPnP (Universal Plug and Play) lets programs ask the router to forward a port automatically. If your router supports it and has uPnP enabled, this is the easiest method by far.
In Coalstack, open your server and go to Networking. In the Port Forwarding section, you will see a uPnP panel. Pick the port (default 25565), choose TCP, and click Enable. Coalstack discovers your router via SSDP, adds the port mapping, and shows a green status indicator when it is active.
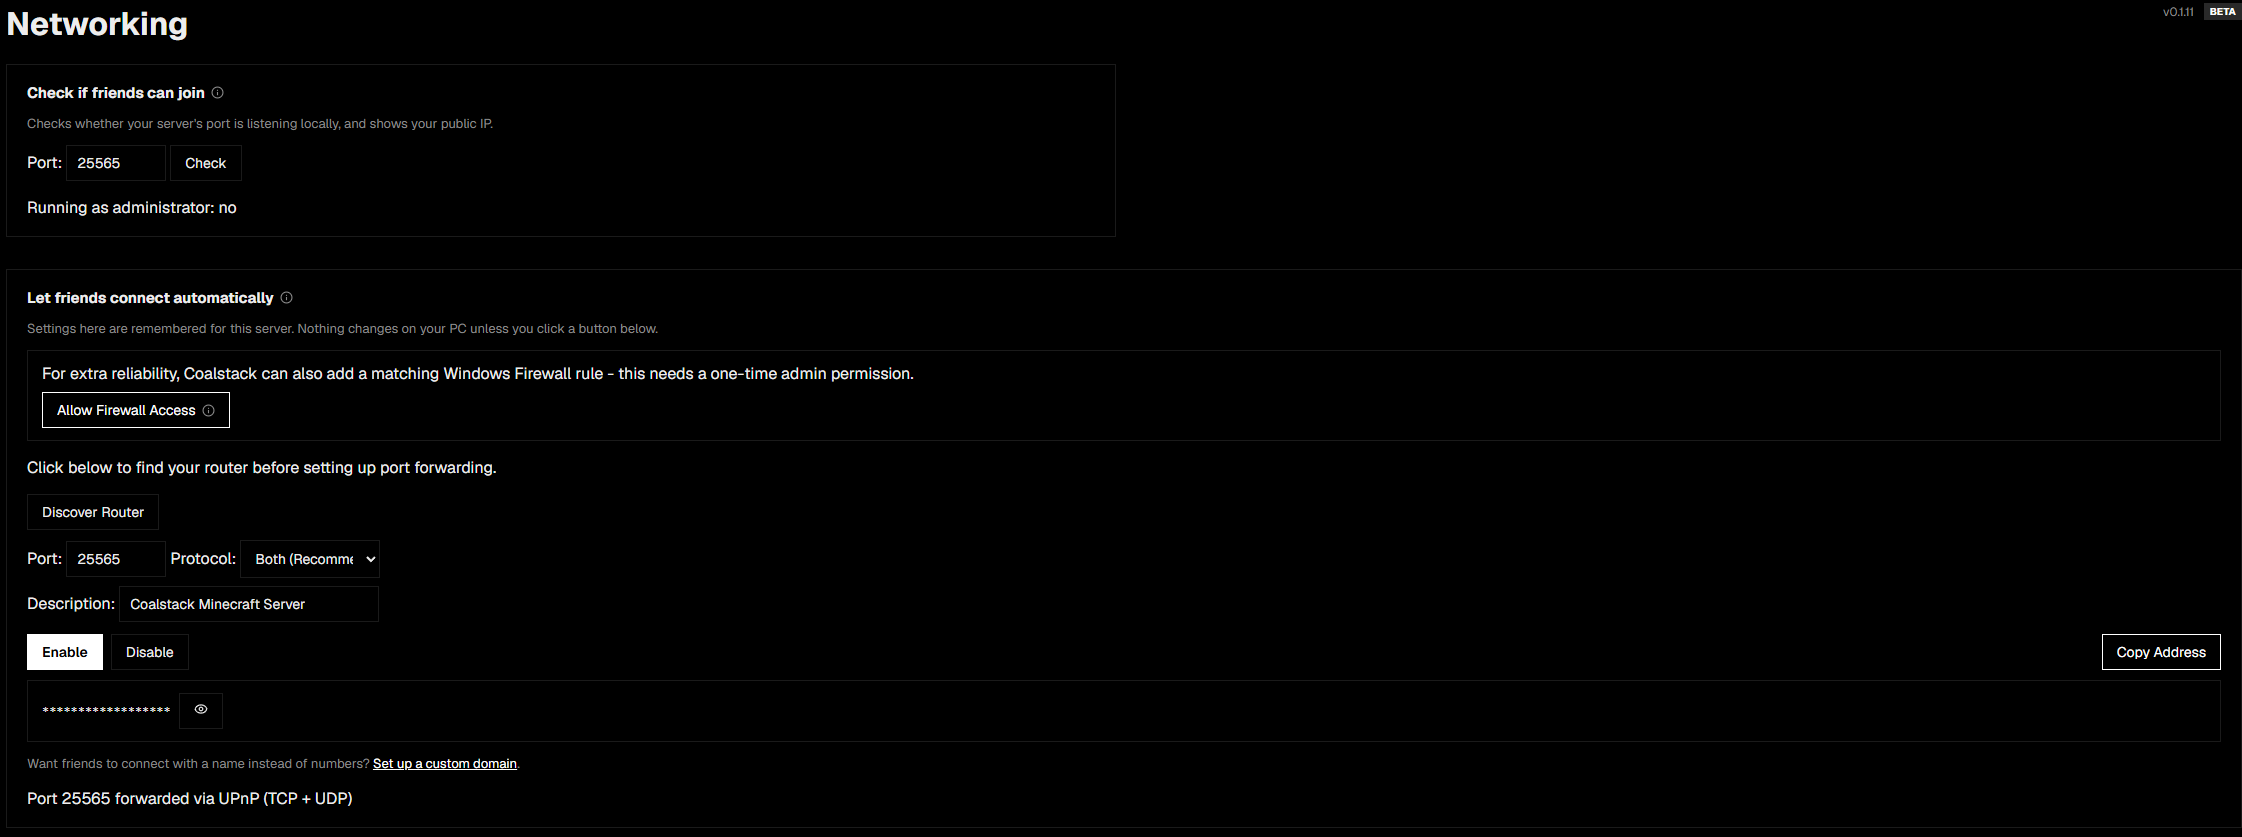
If discovery fails, your router either does not support uPnP or has it disabled. Check your router's admin page (usually at 192.168.1.1 or 192.168.0.1) for a uPnP setting and enable it. If the option does not exist, use the manual method below.
Manual port forwarding
If uPnP is not available, you can add the port forwarding rule through your router's web interface. The exact steps vary by router brand, but the information you need is the same everywhere.
- Find your router's IP. Open Command Prompt and run
ipconfig. Look for the "Default Gateway" address under your active network adapter. It is usually192.168.1.1or192.168.0.1. - Log into your router. Type the gateway IP into a browser. The login credentials are often printed on a sticker on the router itself (look for "admin" and a password).
- Find the port forwarding section. It might be called "Port Forwarding," "Virtual Server," "NAT," or "Applications & Gaming" depending on the brand.
- Create a new rule. You need:
- Service name: anything, like "Minecraft"
- Port range: 25565 to 25565 (or just 25565)
- Protocol: TCP
- Internal IP: your PC's local IP (find it with
ipconfig; look for IPv4 Address)
- Save the rule and restart the router if prompted.
Your server should now be reachable from the internet. Give your players your public IP (shown on the server card in Coalstack) and the port number.
Testing that it works
The easiest way to confirm the port is open: have a friend outside your home network try to connect using your public IP. They should see your server in their multiplayer list and be able to join.
You can also use an online port checker. Search for "port checker" on Google, enter your public IP and port 25565, and run the test. Make sure your server is running when you test; a port checker cannot detect a forwarded port if nothing is listening on it.
If the test fails, double-check that:
- The server is running when you test
- The port forwarding rule points to the correct internal IP
- Your PC's firewall allows incoming connections on port 25565 (Coalstack can add this rule automatically if you run it as administrator)
- Your ISP does not use CGNAT (Carrier-Grade NAT). If it does, port forwarding will not work and you will need a tunneling solution.