

How to Set Up a Modded Minecraft Server (Forge & NeoForge) on Windows
Aug 11, 2026
What you'll need
A Windows PC that can stay on while people are playing, and enough RAM to spare for the server on top of everything else running. You don't need to install Java first - Coalstack works out which version your server needs and downloads it for you the first time. 4GB dedicated to the server is a reasonable floor for a small modded pack; heavier packs want more.
You don't need a hosting provider, a VPS, or any command-line experience for any of this. Everything below happens in one app window.
Forge or NeoForge?
Both are mod loaders for Minecraft: Java Edition - they load Java mods into the game the vanilla server can't run on its own. Which one you want comes down to one thing: which mods you're trying to run.
- Forge has the longer history and the largest back-catalog of mods, especially anything from older Minecraft versions.
- NeoForge is a newer fork of Forge, and on current Minecraft versions it's where most active mod development has moved.
If you already know which modpack or mod list you want to run, check what loader it targets and match it - the two aren't cross-compatible. If you're starting from scratch, NeoForge is the safer default on recent Minecraft versions.
Creating the server
Open Coalstack and click New Server on the Servers page, then Create New Server to launch the Setup Wizard. Pick Forge or NeoForge, the Minecraft version you want, a name, and a parent folder for it to live in.
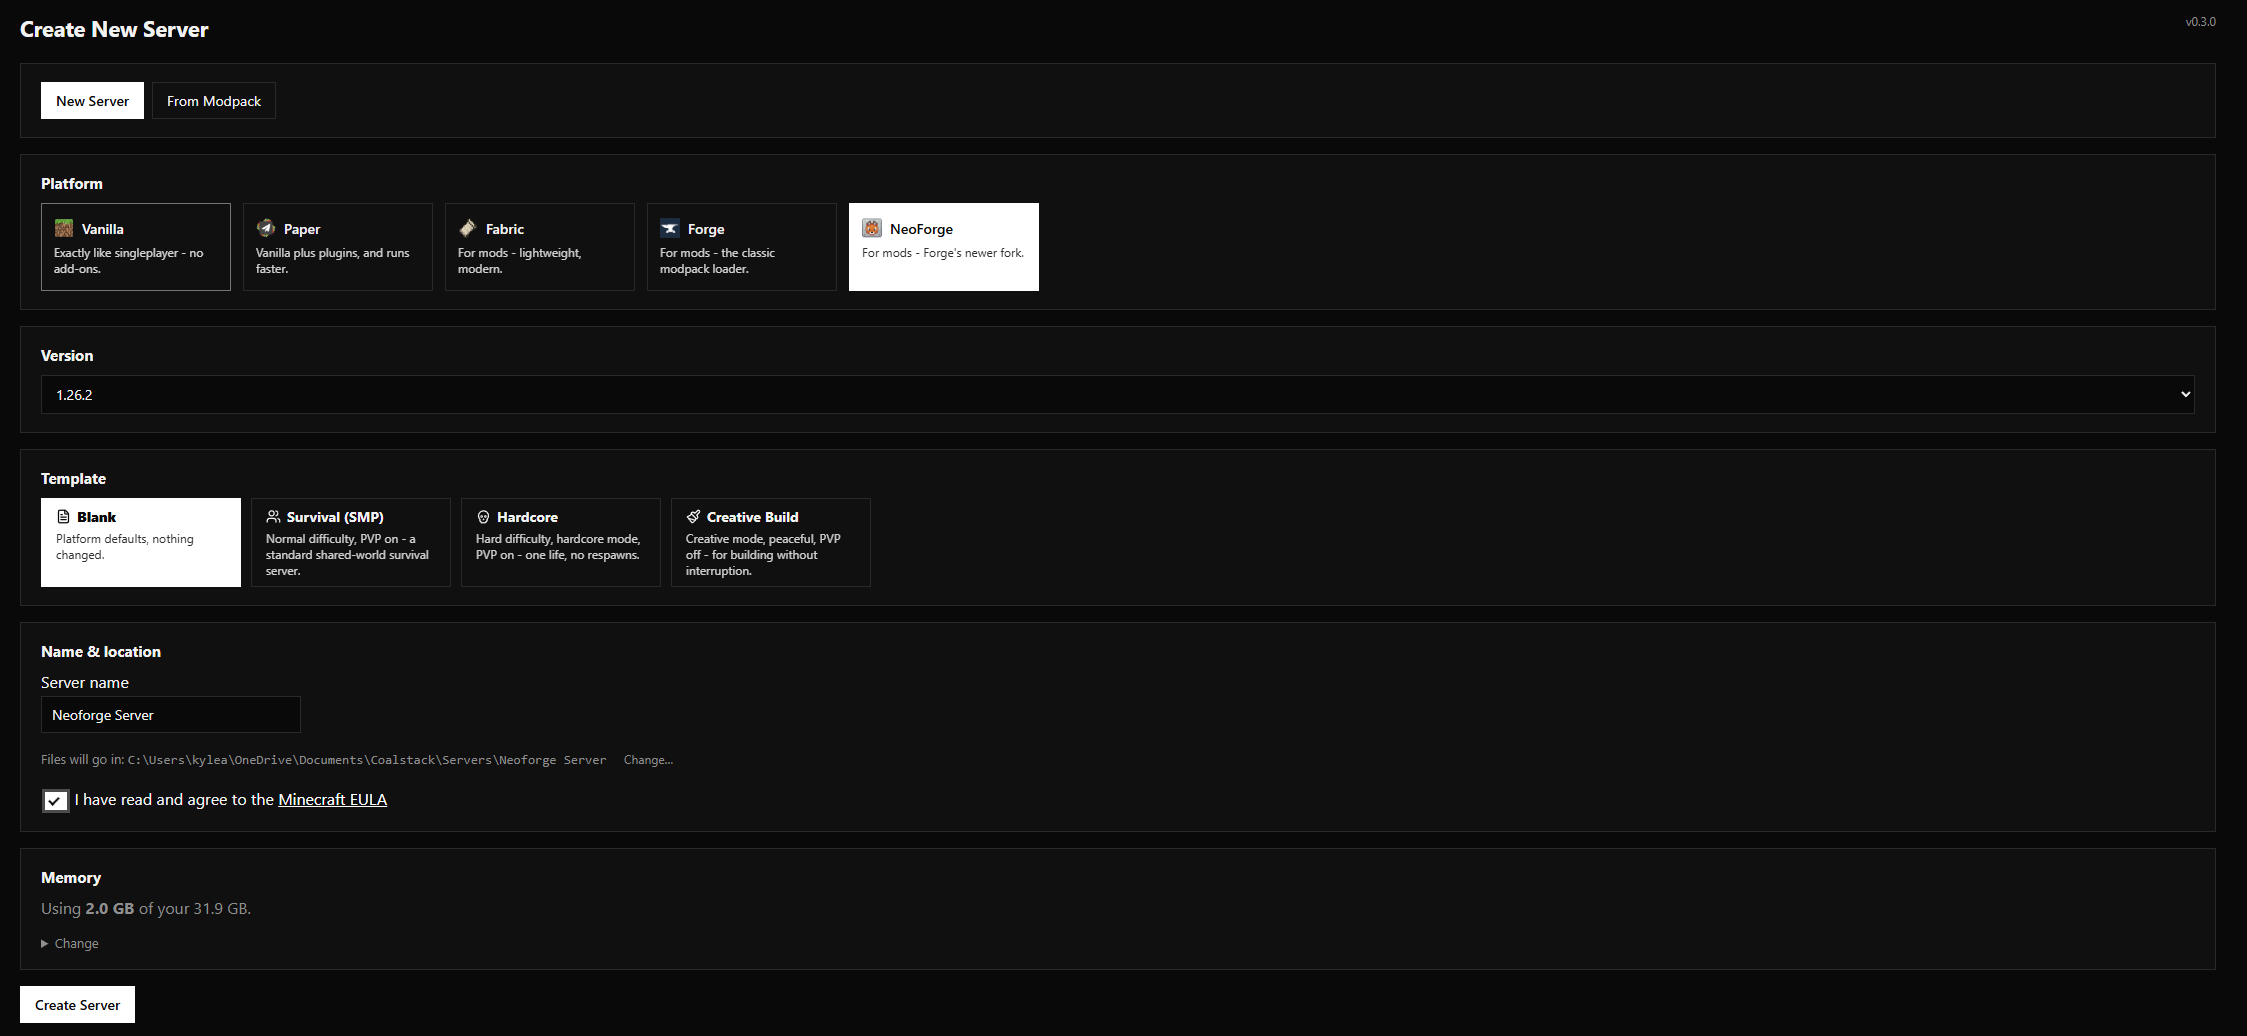
Coalstack downloads the correct server jar for what you picked, creates the folder, accepts the EULA on your behalf, and writes an initial server.properties file. The server is ready to start the moment the wizard finishes - no manual jar hunting, no hand-editing a EULA file.
Already have a modded server folder from somewhere else? Use Choose Server Folder instead and point Coalstack at it - it detects the platform and version on its own and picks up right where you left off.
Installing mods
Open the server's Dashboard and go to Marketplace. The Mods tab is a Modrinth-powered browser built into the app - search by keyword or browse what's trending, and every result shows its description, download count, and which game versions/loaders it supports.

Click a mod to open its detail panel - full description, screenshots, a dependency list with an "Install required dependencies" button so you're not chasing down prerequisites by hand, and a version picker showing every published build with its game version and loader. Installing drops the jar straight into your server's mods folder.
On a PRO license or higher, Coalstack also flags each mod as compatible, incompatible, or unknown against your server's detected platform and version, so a loader mismatch shows up before you start the server instead of as a crash log after.
Starting the server and connecting
Back on the Servers page, hit Start on the server's card. The status pill moves through BOOTING UP to RUNNING once the world's finished loading, and the card starts showing live CPU, RAM, and player count.
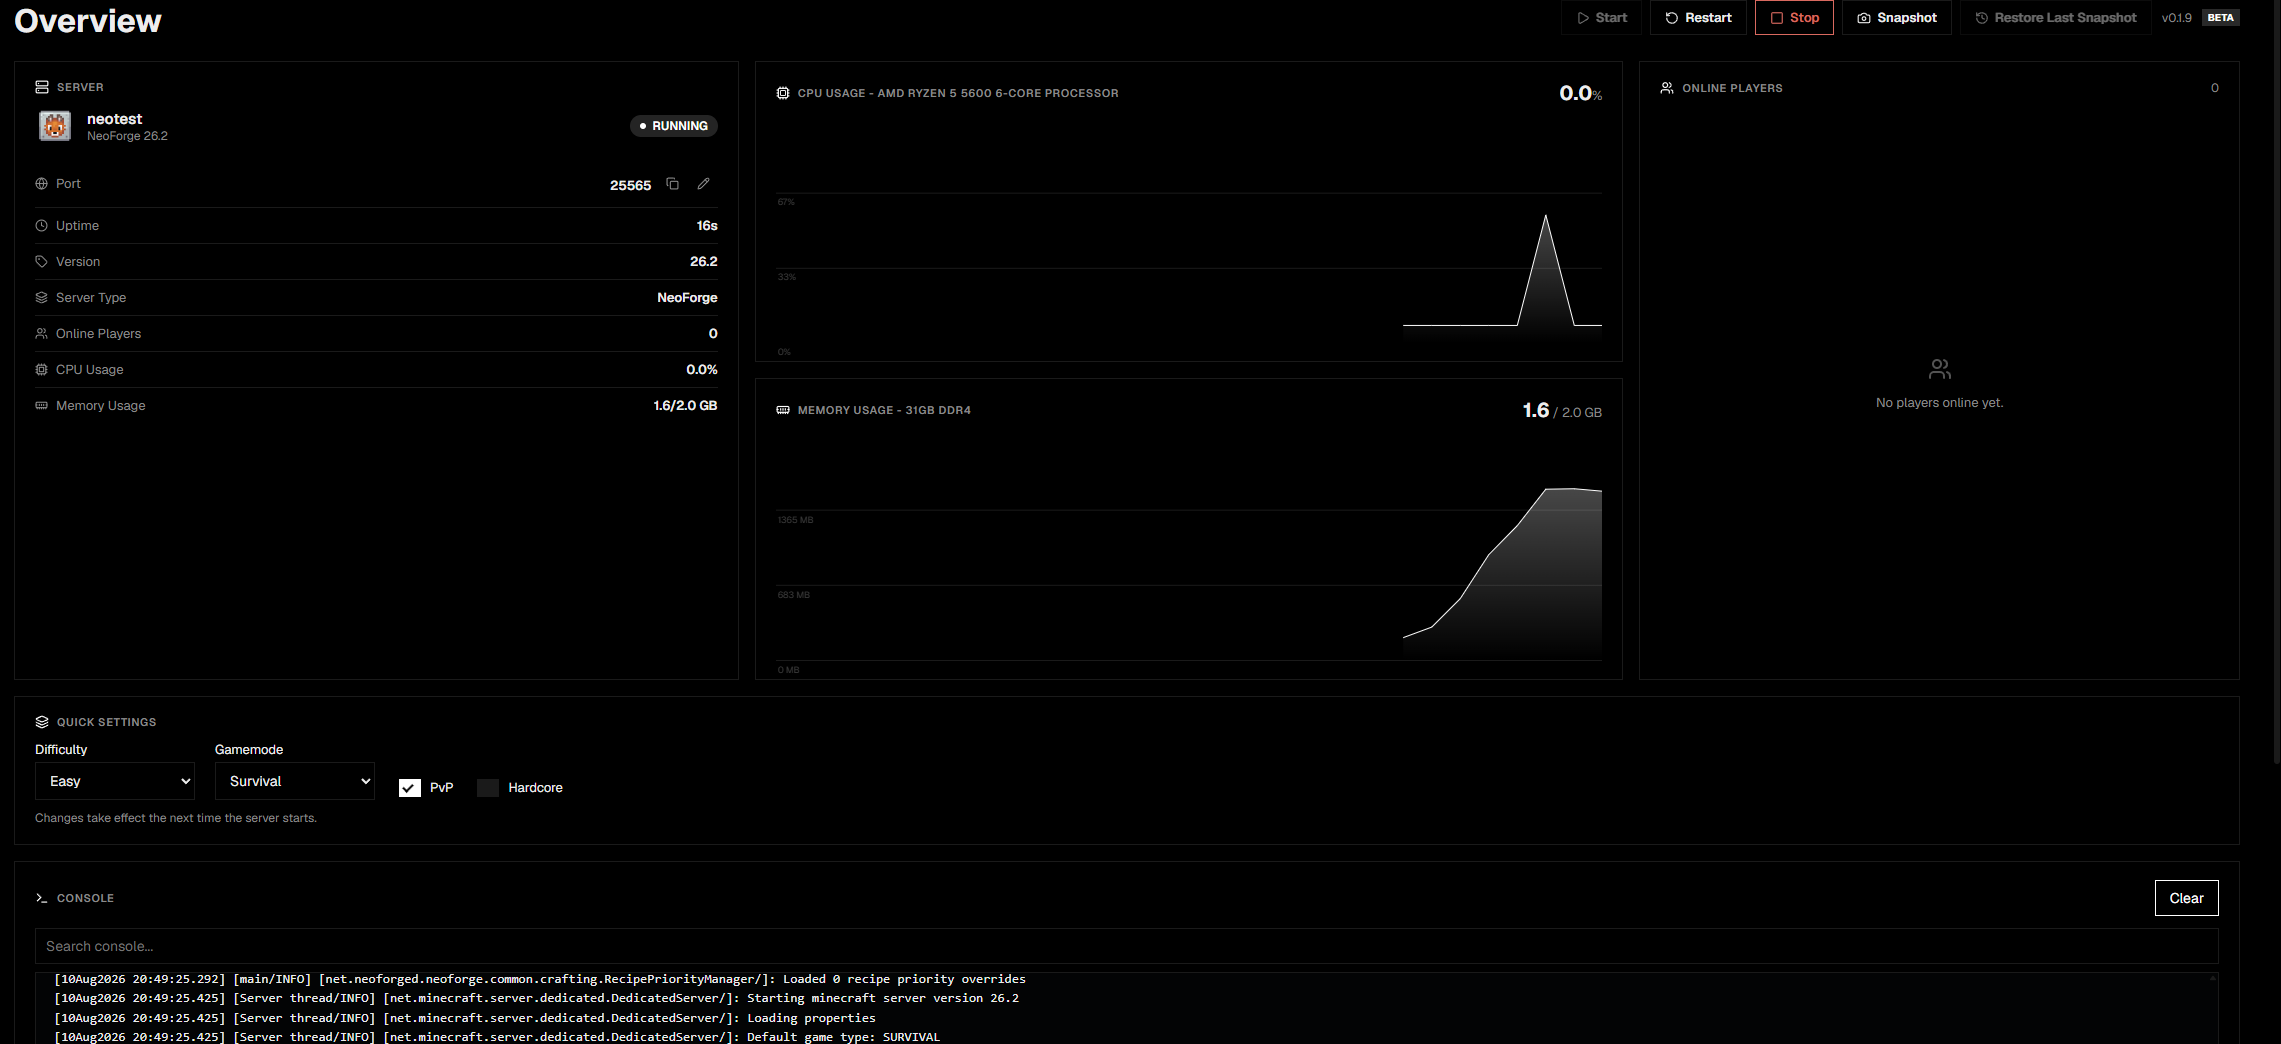
The card's IP address is copyable with one click - send that to whoever you're playing with. If they're not on the same network as you, you'll need to forward the server's port on your router (Coalstack's Networking page has a uPnP option that can do this automatically on routers that support it).
Keeping it backed up
Modded servers are exactly the kind of thing you don't want to lose to a bad mod update or a corrupted chunk. On the Backups page, turn on automatic backups and set an interval - Coalstack zips up every world dimension folder into a timestamped archive on that schedule, checked every 15 minutes while the server's running.
Trying something risky (a big mod update, a new datapack)? Hit "Back Up Now" for a manual backup first, or use a snapshot - same idea, but capped to the 5 most recent, for quick save points rather than long-term archiving. Both restore from the same Backups page if something goes wrong.